Configuration via Experience Builder Settings
The ncWMS widget comes with a settings interface to customize it’s content via the Experience Builders standard settings UI. Here you can manually create and modify WMS Configs and their visualizations.
Note
Configuration you do via data sources (see Configuration via datasource) will be merged into the configuration make via the settings UI. The configuration via the settings UI however takes precedency over the data sources.
Removing the default configs
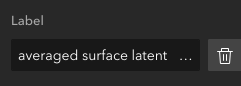
Likely you do not want to visualize the services that are configured by default, so you just remove them by clicking the little trash icon next to their label in the WMS configuration setting section
You can do so for each and every service, or you customize an existing config as described in the next section.
Adding a new config
To add a new config, you have two options:
manually entering a label and modifying it
uploading a config from your computer
Manually
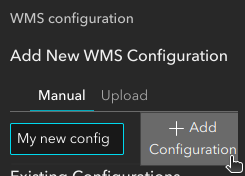
Click the ncWMS widget in your experience builder and in the sidebar, look for the section Add New WMS Configuration. Select the Manual tab, enter a label for the config and click Add Configuration
You can then add and modify services as described in the next section Modifying an existing config.
Via upload
You can upload a json file, such as this one here
to create a new config.
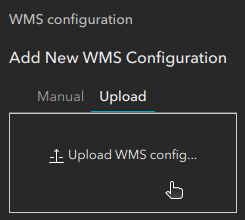
Click the ncWMS widget in your experience builder and in the sidebar, look for the section Add New WMS Configuration. Select the Upload tab, click the Upload WMS config button and select the JSON file with the configuration.
You can then modify the config as described in the next section Modifying an existing config.
Modifying an existing config
To modify an existing service, click the ncWMS widget in your experience builder. In the now open settings sidebar for the widget, look for the service in the WMS Configuration section.
Modifying an existing service
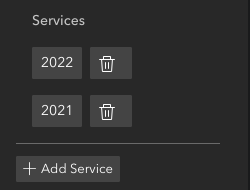
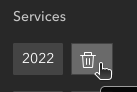
Each service in a config (or in other words each netCDF file) is available through a button in the Services section for the config
To configure a service (i.e. it’s label and the GetCapabilities url), click
it’s button and edit the URL and label in the appearing sidebar
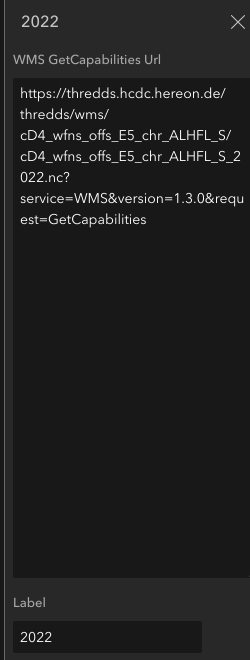
- label
The label determines the name of the tab for the service. If the WMS config has only one single service, there will be no tabs and the label does not have any effect. url
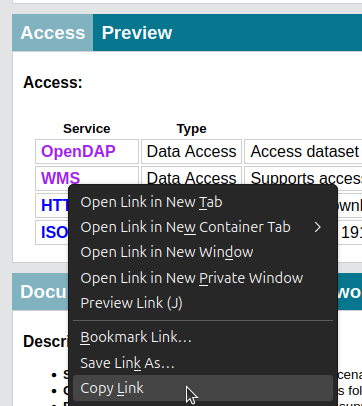
The URL of the service is the so-called
GetCapabilitiesprovided by your ncWMS-Server. If your using a THREDDS-Server (this one here for instance), you can get this by copying the URL of the WMS-Link in the Access-Section of your netCDF file
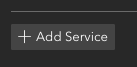
Adding a new service
To add a new service, simply click the + Add Service button and then configure it as described in the previous section.
Deleting a service
Self-explanatory, but for the sake of completeness: click the little trash icon next to the button of the service to delete it
Modifying the default dimensions and visualizations
At the bottom of each WMS Config section you find a button named Default dimensions. It can either be just white text, or it has a little red symbol at the end
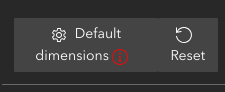
This little red symbol indicates that some default visualization and dimensions have been selected for this WMS Config. To restore the default state (i.e. let the ncWMS server decide what and how to visualize), click the Reset button next to it.
By clicking the Default dimensions, another sidebar will open where you can configure the default dimension and visualizations.

Warning
The available color settings are loaded from the ncWMS server. As such, for technical reasons, you might not see them in the beginning. If so, just click the Default dimensions again.